Hello! Today we will talk about a very useful topic that will be very useful for our field work, when we have to use an electrical machine in a place where there is no contact nearby, that’s where we’ll need an extension.
We will learn to make our own extension with 3 cables, that in our example those 3 cables are in a heavy duty cable and what we need are very simple things, in addition, the contact that we will use is quite simple to install since you only have to insert the wire inside the terminal. This makes our work much easier when it comes to making our extension, since if we do not have much experience with electricity and do not know some good practice tips, we can cause an accident or damage our equipment.
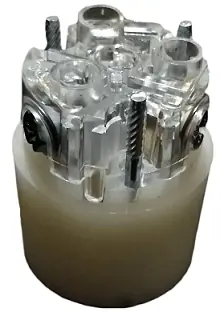
The contact that we will show in this post is the one that can be seen in the following figure:
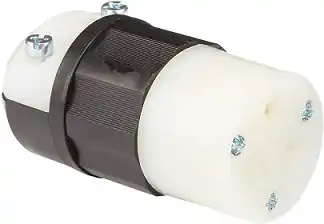
You can get this contact by clicking here. It is of the Leviton brand and is an industrial grade contact.
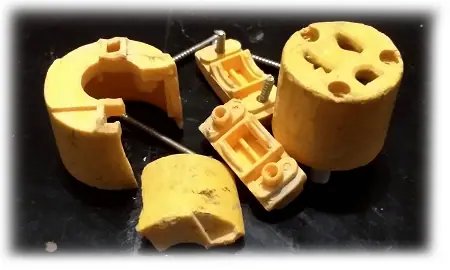
We are implementing this new contact because a previous contact was already flamed and was already broken. This is dangerous for our work for logical safety reasons, perhaps causing an electrical machine to be damaged or for us, due to some mistake, to touch the phase because the contact is broken and we have an accident. Look at the following image, the contact itself was already half destroyed.
What we will need to make our extension are the following materials:
- 3 x 12 AWG heavy-duty cable, the length of the cable you want, it can be 30 meters, 20 meters, 10 meters. Whatever you are going to use
- 15 or 20 Amp Industrial Grade Leviton Contact. There are different amperages depending on the load that we are going to connect.
- Leviton 15 or 20 Amp industrial grade plug. There are different amperages depending on the load that we are going to connect.
- Cutter
- Pliers wire cutter
- Cross and flat screwdriver
- And if we want we can also have a cable stripper
We are opting for that plug and that contact for our extension because we consider that they are the most practical when making our extension since we only have to insert the cable where the screw clamp is located and we do not have to hug the screw with the cable so you have a good grip. We will now explain the procedure for arming the extension.
How to make an electrical extension with a ground pole
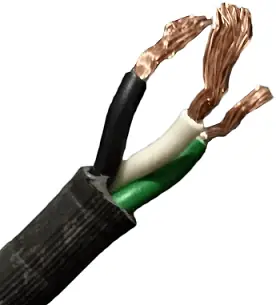
What we will do to begin with is stripping our heavy-duty cable at the heavy-duty part (in the jacket that hugs the 3 cables), stripping at a distance of approximately 2.4 cm from the end of our cable. Then from the tip of each cable we will strip an approximate 1.4 cm. Having something similar to the following:
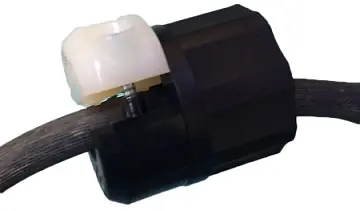
Next we will put our cable in the part of the contact that is the clamp, being careful not to mess up the cables. This step could have been done before stripping the wires, but it’s almost indifferent.
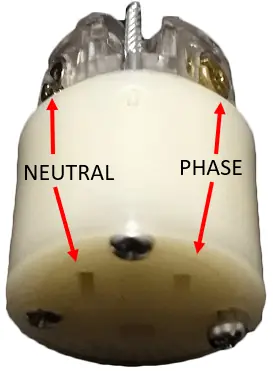
And now on the back where the cables enter, as shown in the following image:
Here we will insert our cables in each of the holes, nothing more than we do have to know the regulations to connect it correctly, where the phase has to go in the screw that corresponds to the small hole, the neutral goes to the screw that corresponds to the big hole and the ground cable goes in the screw that corresponds to the hole that is almost circular.
Once we have identified where each cable will be, we proceed to insert and tighten them, thus obtaining the following:
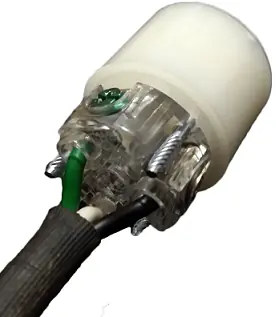
Now we simply have to join our clamp and tighten the corresponding screws in order to have our extension ready.
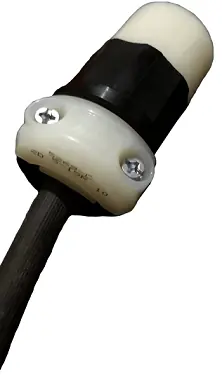
And now we follow the same steps on the other side to put our plug and done, we officially have our extension ready. Just remember that if we see the plug from the front with the ground leg below, we will have that the leg on the left is where the phase cable will go and the phase cable will go on the one on the right.
Thank you for being in this moment with us : )